Contents
Migrate to ETH ID's Matrix service
All D-ITET institutes and groups (except those paying for the service) have to migrate away from ISG D-ITET's Matrix service to ETH ID's Matrix service. This article explains how to do this.
Read this manual completely before starting your migration
Afterwards decide which migration cases you want to follow
When you start your migration, follow the order of the migration steps outlined here.
Terms, abbreviations and main steps
The terms and abbreviations described in this paragraph will be used throughout the remainder of this document.
The homeserver is the Matrix service on which an account or room was initially created. The following four homeservers are distinguished:
Homeserver
Managed by
Available to
Type
Web access
matrix.ee.ethz.ch
ISG D-ITET
staff
old
matrix-stud.ee.ethz.ch
ISG D-ITET
students, staff
old
staffchat.ethz.ch
ETH ID
staff
new
studentchat.ethz.ch
ETH ID
students
new
The D-ITET homeserver will be referred to as the old homeserver, the ETH ID homeserver as the new homeserver.
Make sure you know which is your old and new homeserver based on your ETH affiliation (staff or student).
The credentials you use to login on both old and new homeservers are always your ETH login and ETH password
- At first login on a homeserver, your account is created. It stores your settings on the homeserver.
Your account on the new homeserver is referred to as your new account, your account on the old homeserver as your old account.
Rooms on the old homeserver in which you have the role Admin are referred to as Your rooms
All other rooms in which your role is Default are referred to as rooms you joined or rooms you are a member of
Public rooms can be joined by anyone, private rooms can only be joined after receiving an invite
- 1:1 people chats are identical to rooms from a technical viewpoint and not distinguished here. All actions referring to rooms have to be applied to 1:1 people chats as well. Certain actions do not have a user interface (as opposed to rooms) and need to be completed through the developer tools.
Migration cases
You might want to do a simple migration or a more complex one, depending on your personal preference. Make sure you understand the necessary preparation and decide which migration cases you will do.
The first step of any migration case is to set up your new account.
Afterwards you could passively wait until your new account gets invites to rooms and be done with the migration.
If you want to invest more time, you can actively start to join the rooms your old account is a member of and ask for invites for your new account.
If you want to be able to decrypt the chat history of a room, which originated on the old homeserver with your new account, you will have to transfer your E2E keys.
If you are a room admin, you could simply set up a successor room on the new homeserver and let people know how to join it, provided the chat history of the original room is irrelevant.
Or if you want to retain your room's chat history you can set up your new account as room admin and proactively invite the new accounts of existing (old) room members
Preparation
For the migration to go smoothly there are mandatory steps you need to do. The optional steps are for your convenience and not strictly necessary, but helpful.
Mandatory preparation
Prepare your new account
- Log in on your new homeserver (see next step for how to do this). This step creates your account and allows others to invite you to rooms with your new account.
Read the official documentation on how to set up your new account on ETH ID's Matrix service
- Set up your new account as outlined in the official documentation
Verify security settings and sessions of your old account
As described in ETH IDs official documentation under Self-Verification:
- Do the self-verification of sessions you have on different devices
- Verify and clean up your sessions
Optional preparation
For the following migration steps, it is convenient to open a browser window logged into your old and new account each, to be able to switch back and forth between them.
Visually distinguish your old and new account
- To be able to visually distinguish your old and new accounts, you might want to upload different profile pictures for the time of the migration
It might also be helpful to change the display name of your accounts for the same purpose (See screenshots under How to invite an account for examples)
Add homeservers to enable room search
A foreign homeserver can be added to an account to enable search for public rooms on the foreign homeserver. Do the listed steps for both your old and new account. Specifically, while logged into your new account, add the old homeserver. While logged into your old account, add the new homeserver.
In the column listing your rooms, click on the plus symbol [+] to the right of the title Rooms:

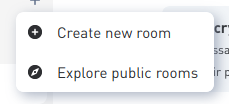
From the popup menu select Explore public rooms:
Click on the arrowhead pointing downwards [⋁] next to Matrix rooms [<homeserver>]:

In the popup menu select Add a new server:

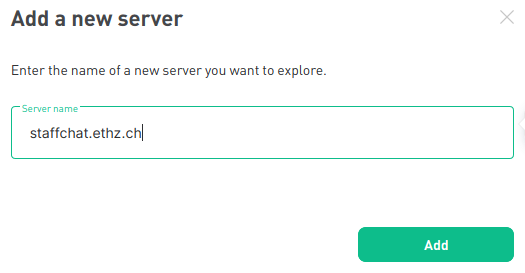
Enter the new homeserver if you are working with your old account; enter the old homeserver if you are working with your new account.
The homeserver in the screenshot staffchat.ethz.ch is an example if you are a staff member and are logged into your old account. Make sure you enter the foreign homeserver matching your ETH affiliation here.
Click on Add
This enables to search for rooms you might only know part of the room's name. Another way to access rooms is by using their name or ID.
Enable chat history decryption for your new account
In case you are not interested in any room's chat history, skip ahead to the next step. Be aware by skipping this step, previous chat history will never be available to your new account.
For your new account to be able to read the chat history of the freshly joined rooms, the end to end (E2E) room keys have to be exported from your old account and imported with your new account.
The E2E keys of a room are rotated every 7 days or after 100 messages so this step needs to be done quickly after joining a room with your new account to keep the time between export and import minimal.
Export E2E keys from your old account
In your old account:
Click on your display name in the top left area to open a popup menu containing the account settings:
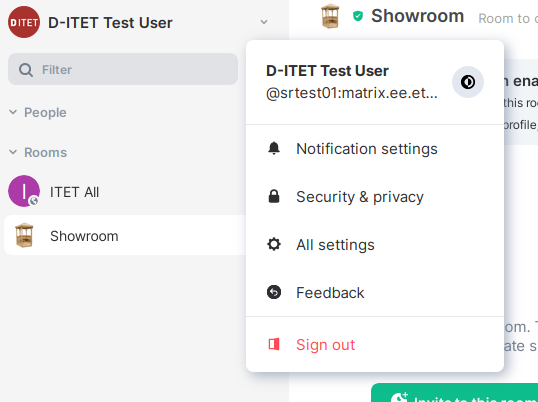
Select Security & Privacy:

Under Encryption → Secure Backup click on Restore from Backup to make sure all your room keys are loaded in your session:

Under Encryption → Cryptography click on Export E2E room keys to save the room keys to a file:

Then continue by importing the keys in your new account without delay
Import E2E keys to your new account
In your new account:
As with the export step before, go to Settings → Security & Privacy → Encryption → Cryptography
Click on Import E2E room keys to load the room keys from the file you previously saved
Join rooms with your new account
This might be as simple as accepting invites to rooms. For rooms you have not gotten an invite, yet, you can check their settings and try to join them yourself. If rooms are private, you will have to ask for an invite. Whenever you successfully joined a room with your new account, leave it with your old account.
Accept invites with your new account
Check if your new account already received invites to rooms your old account has joined:
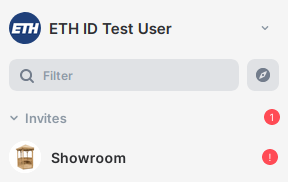
Accept the invites for those rooms you want to join:
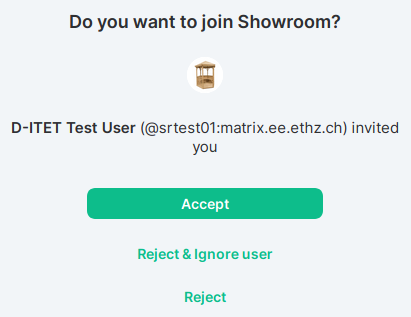
Check uninvited rooms' settings
With your old account, repeat the following steps for each room your new account has not been invited to, yet. The example room used here is called Showroom. The goal here is to figure out a room's privacy setting and its address or ID.
- Hover your mouse over a room's name in the room list
Click on the triple dots [···] when they appear
Select Settings in the popup menu:
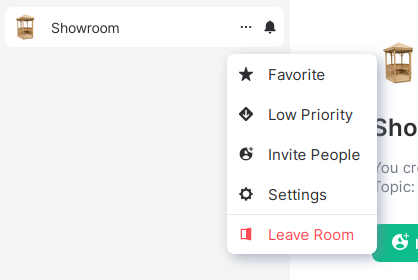
Check the room's access settings under Security & Privacy → Who can access this room?

Note the room's address or ID from the last part of the room's URL, beginning with either a hash [#] or an exclamation mark [!]:
#<room address>:<rooms homeserver>
!<room id>:<rooms homeserver>
Alternatively, you can find a room's address in its settings under General → Room Addresses → Published Addresses → Main Address. Our example room's address is #showroom_localaddress:matrix.ee.ethz.ch:

And its ID under Advanced → Room information:

Depending on the setting, your next step is either to join a public room or ask for an invite if it is a private room.
Join public rooms with your new account
This is possible if a room is public, i.e. its access setting is Anyone who knows the room's link, apart from guests or Anyone who knows the room's link, including guests:
→ try to join these rooms with your new account by entering each room's URL in your browser's URL field:
https://<new homeserver>/_matrix/client/#/room/#<room address>:<rooms homeserver>
https://<new homeserver>/_matrix/client/#/room/!<room id>:<rooms homeserver>
Alternatively, you can search for a public room after you added the room's homeserver and join it directly.
Ask for an invite to a private room for your new account
This can be done in private rooms where your old account has been previously invited to, i.e. the room's access setting is Only people who have been invited:
→ With your old account enter the room you want your new account to join and ask the room admins to invite your new account:
Please invite my account @<ETH username>:<new homeserver> due to the Matrix migration from D-ITET to ETH ID.
Admins are labelled as such in the room members list. In case the list is too long, look for a room admin in the room's settings under Roles & Permissions.
Leave rooms with your old account
After successfully joining a room with your new account, leave the room with your old account. This step is important, as deletion of a room from the old homeserver is only possible when there are no more members with local accounts:
- Open the popup menu containing the room's settings again
Double-check your old account does not have the role Admin in the room.
If it has, you ended up in the wrong part of this article. Continue with Set up your new account as admin and do not do the next step mentioned below.Select Leave Room
Your old account can only be deleted from the old homeserver after it left all rooms, so make sure you see no more 1:1 people chats listed under People or rooms listed under Rooms.
Establish your rooms on the new homeserver
You have the choice of recreating your rooms from scratch on the new homeserver and invite room members again with their new accounts or allow anyone to join by themselves. This is an easy way to clean up the chat history and memberships. If you set up such a successor room on the new homeserver, post it is address in your old room, so current room members are able to find and join it with their new accounts.
If you want to keep the chat history of a room, follow the steps below to synchronize your rooms to the new homeserver.
Exception: Local rooms
The exception are local rooms set up to be accessible only on their homeserver. They cannot be synchronized to another homeserver. Such rooms will have to be re-created on the new homeserver, the chat history will be lost.
Rooms with such a setup show the line This room is not accessible by remote Matrix servers under Room Settings → Advanced → Room information:

- If this line isn't shown, the room isn't local
- If you invite an account on the new homeserver to a local room on the old homeserver, the invite will fail
Set up your new account as admin
Elevating an invited user to the role Admin can be done within the user interface for rooms. The steps for 1:1 people chats have to be done with the developer tools.
Invite your new account
With your old account, repeat the following steps for each of your rooms/1:1 people chats:
Invite your new account with your old account
Have your new account accept the invite. Verify this happened in the chat history:

Elevate your new account to room admin in a room
With your old account, grant your new account the role Admin by clicking on its profile picture appearing in the chat stating its joining.
Grant your new account the role Admin:
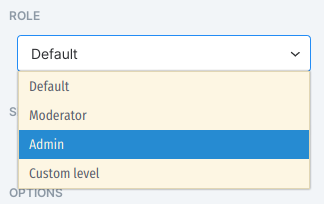
On the appearing warning dialogue, click Continue
Elevate your new account to room admin in a 1:1 people chat
- Open the popup menu containing the room's settings
Click on Advanced
Click on Open Devtools
Click on Explore Room State
Click on m.room.power_levels
In the appearing window, scroll down and click on Edit
In the section "users": {...}, put the line "@<ETH username>:<new homeserver>":100, between the two already listed users
Click on Send
Get back to the initial settings window by clicking on the [X] in the top right corner of the current window
- Leave the settings window
Verify the new role
Verify the role change is visible in the room's chat history:

Replace room members with their new accounts
Depending on your room's setting, people either need your invite to join the room or can join freely. If an invite is necessary, repeat the following steps with your new account for each of your rooms. If your room has other admins than yourself, coordinate these steps with them:
Invite members again with their new accounts.
Some users might not have logged into their new account and cannot be invited yet.
The Computer Vision Lab (CVL) will not migrate to the new homeserver and its members do not need to be invited with their new accounts.- After a successfully sending an invite to a new account, kick its corresponding old account out of your room to facilitate later deletion of the room from the old homeserver
Leave your rooms with your old account
With your old account, repeat the following steps for each of your rooms:
Verify your new account has the role Admin
- Leave the room
Additional how-tos
As inviting a new account and verifying the action is critical to the migration process, this seemingly simple task is explained here in detail.
How to invite an account to one of your rooms
The example room used here is called Showroom, the old account used in the example is called D-ITET Test User and the new account ETH ID Test User.
- Right click on the room in the column listing all rooms
If the room has no members, yet, click on the button Invite to this room:

Otherwise open the popup menu of a room containing Settings and select Invite People
Type the account you want to invite into the field left to the green button labelled Invite:
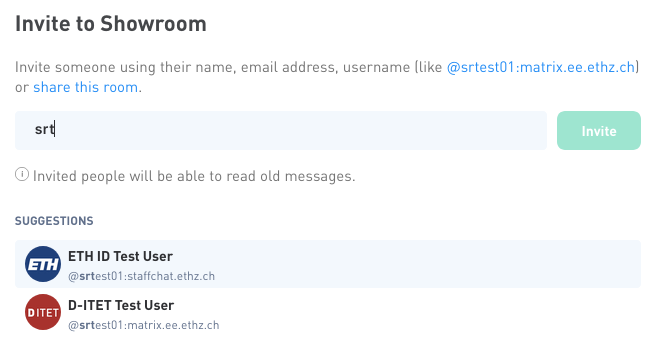
While you are typing, account suggestions appear in the lower part of the window. Select the account from the suggestions:
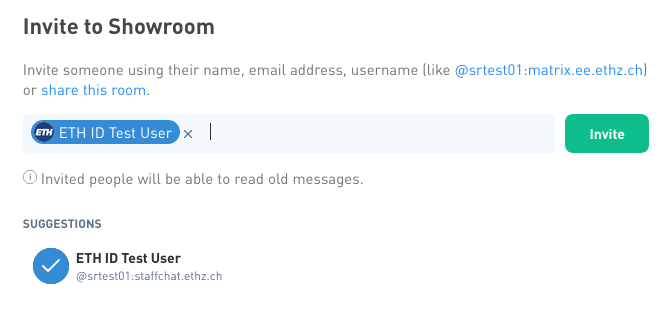
Click on Invite
Verify the invite appeared in the room's chat history:
