|
Size: 1038
Comment:
|
Size: 3681
Comment:
|
| Deletions are marked like this. | Additions are marked like this. |
| Line 1: | Line 1: |
| '''DRAFT: This page is currently being edited and created. Content is subject to change within minutes.''' | #rev 2020-09-07 adjordje ## page was renamed from Workstations/Network/VPN/Mac OS X 10.x = ETHZ VPN with Mac OS X = The following instructions describe how to set up the VPN Connection with Cisco AnyConnect on OSX Operating Systems. '''Note:''' The Documentation was created with OSX 10.15.6 Catalin '''Note: In case of Credentials Problems ''' A bug was discovered in 10.6 and 10.6.1 which forces the user to enter his credentials each time when trying to connect the VPN, even if the password was saved. If you suffer from this misbehaviour, see the following page to correct it: [[Workstations/Network/VPN/Mac OS X 10.6 "Snow Leopard"/OSX VPN Credentials Bug Correction|OSX VPN Credentials Bug Correction]]. == Installation Steps == === Step One === * Visit the website [[https://sslvpn.ethz.ch|Cisco AnyConnect]] {{attachment:1.png|sslvpn.ethz.ch|width=660.5 height=287.5}} === Step Two === * To Log into the Website use following {{attachment:2.png|login Site|width=352 height=206}} Username (Use Following Combination for your Username): '''your NETHZ Username''' + '''@staff-net''' or '''student-net''' + '''ethz.ch''' Password: '''your Wifi/VPN Password''' '''Information:''' It is not the same Password as the NETHZ Password. If you can not remember it anymore or you are using the first Time VPN, change or set the Password [[https://password.ethz.ch|here]]. === Step Three === * When you logged in successfully, the download will start automatically. If not, a download link will be created. {{attachment:3.png|Download Link|width=619.5 height=366}} === Step Four === * Search and Open Cisco AnyConnect {{attachment:4.png|Open AnyConnect|width=720 height=450}} === Step Five === {{attachment:5.png}} === Step Six === {{attachment:6.png}} |
| Line 4: | Line 62: |
| || 1 || Open System Preferences. || {{attachment:001.png|Sysprefs|height=200}} || | || 1 || Open System Preferences. || {{attachment:001.png}} || |
| Line 7: | Line 65: |
| 1. Set 'Interface' to 'VPN' 1. Set 'VPN Type' to 'Cisco IPSec' 1. Set a name for the service, for example 'ETHZ VPN' 1. Click on 'Create' 1. Set 'Server Adress' to 'vpn-cluster.ethz.ch' 1. Set 'Account Name' to your nethz username. 1. Set 'Password' to your nethz password (unless you want to enter it each time you connect.) 1. Click on 'Authentication Settings' 1. As shared secret, enter 'ETHZ.spezial' (note the dot.) 1. For 'Group Name', enter 'ETHZ-spezial' (note the dash.) 1. Click on 'OK' to close the window. 1. Click on 'Apply'. |
|| 4 || Set 'Interface' to 'VPN' || {{attachment:004.png}} || || 5 || Set 'VPN Type' to 'Cisco IPSec' || {{attachment:005.png}} || || 6 || Set a name for the service, for example 'ETHZ VPN' || ''(see above)'' || || 7 || Click on 'Create' || ''(see above)'' || || 8 || Set 'Server Adress' to 'vpn-cluster.ethz.ch' || {{attachment:006.png}} || || 9 || Set 'Account Name' to your nethz username. || ''(see above)'' || || 10 || Set 'Password' to your nethz password || ''(see above)'' || || 11 || Click on 'Authentication Settings' || ''(see above)'' || || 12 || The shared secret is available on the following page: [[https://www1.ethz.ch/id/servicedesk/guide/vpn/vpn_secret|ID Tipps: VPN]]. You must authenticate with your nethz credentials in order to see it. Enter the password '''without the quotes''' into the field 'shared secret'. Your input will be hidden. || {{attachment:007.png}} || || 13 || For 'Group Name', enter '''ETHZ-spezial''' ''(note the dash!)'' || ''(see above)'' || || 14 || Click on 'OK' to close the window. ||''(none)''|| || 15 || Click on 'Apply'. ||''(none)''|| || 16 || For your convenience, activate the checkbox "Show VPN status in menu bar". An additional symbol will appear on the right side of the menu bar at the top of the screen. || {{attachment:008.png}} || || 17 || By clicking on the symbol mentioned in the previous step, you can connect and disconnect the VPN. || {{attachment:009.png}} || ---- [[CategoryNET]] |
ETHZ VPN with Mac OS X
The following instructions describe how to set up the VPN Connection with Cisco AnyConnect on OSX Operating Systems.
Note: The Documentation was created with OSX 10.15.6 Catalin
Note: In case of Credentials Problems A bug was discovered in 10.6 and 10.6.1 which forces the user to enter his credentials each time when trying to connect the VPN, even if the password was saved. If you suffer from this misbehaviour, see the following page to correct it: OSX VPN Credentials Bug Correction.
Installation Steps
Step One
Visit the website Cisco AnyConnect
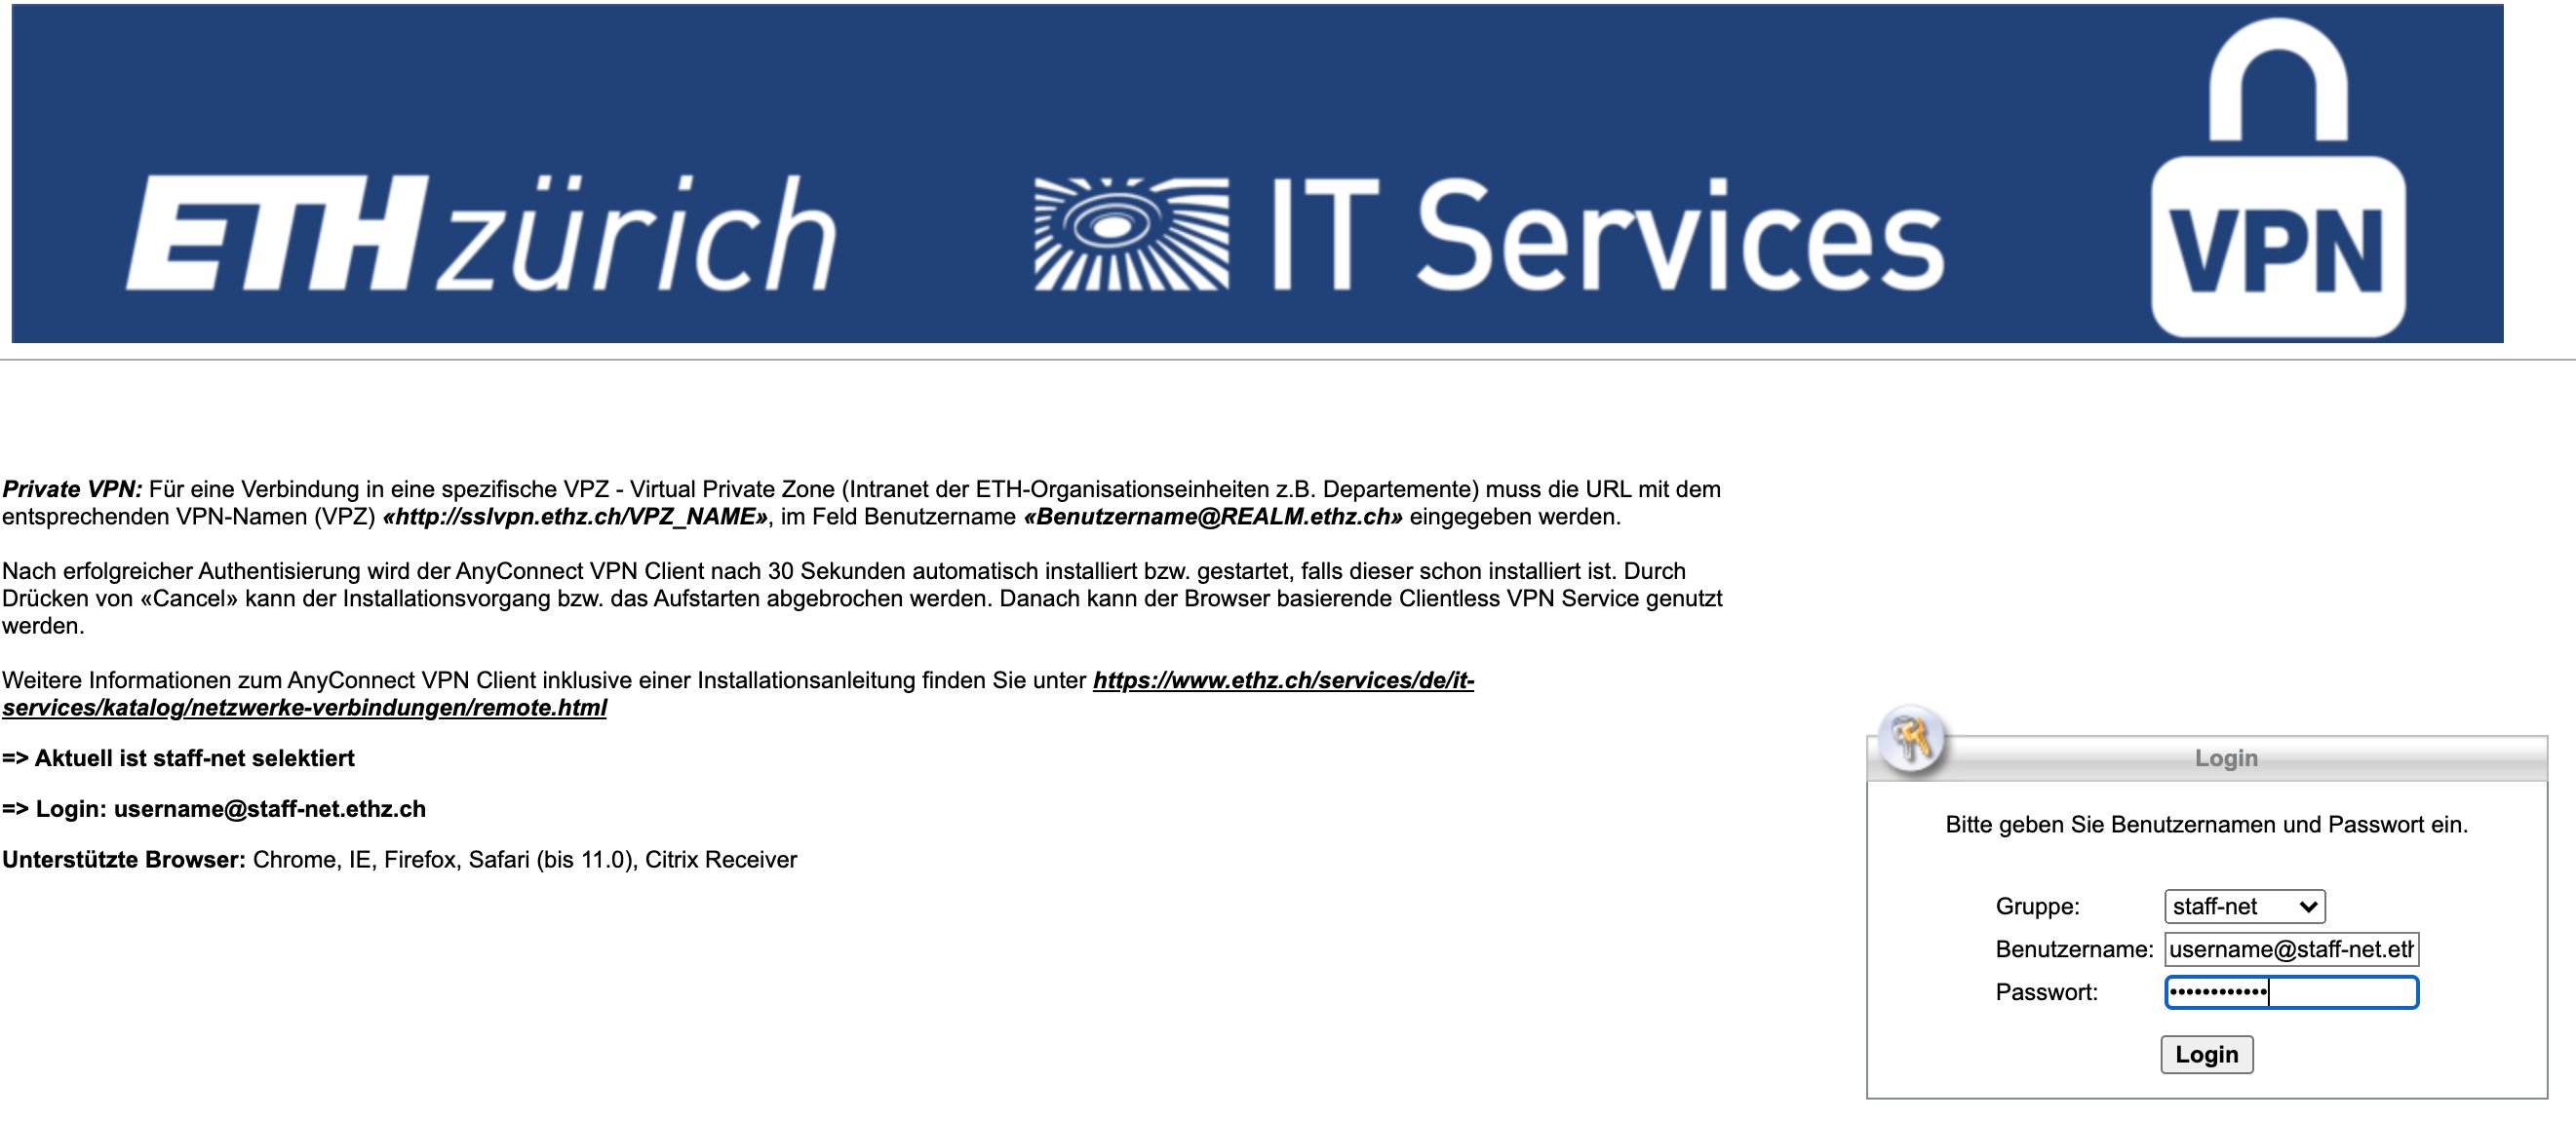
Step Two
- To Log into the Website use following
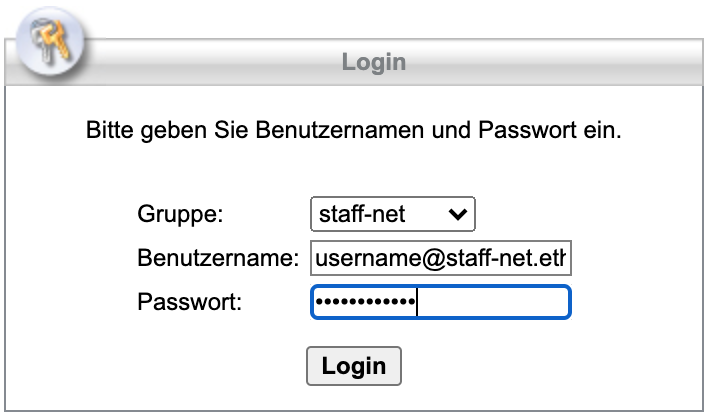
Username (Use Following Combination for your Username): your NETHZ Username + @staff-net or student-net + ethz.ch
Password: your Wifi/VPN Password
Information: It is not the same Password as the NETHZ Password. If you can not remember it anymore or you are using the first Time VPN, change or set the Password here.
Step Three
- When you logged in successfully, the download will start automatically. If not, a download link will be created.
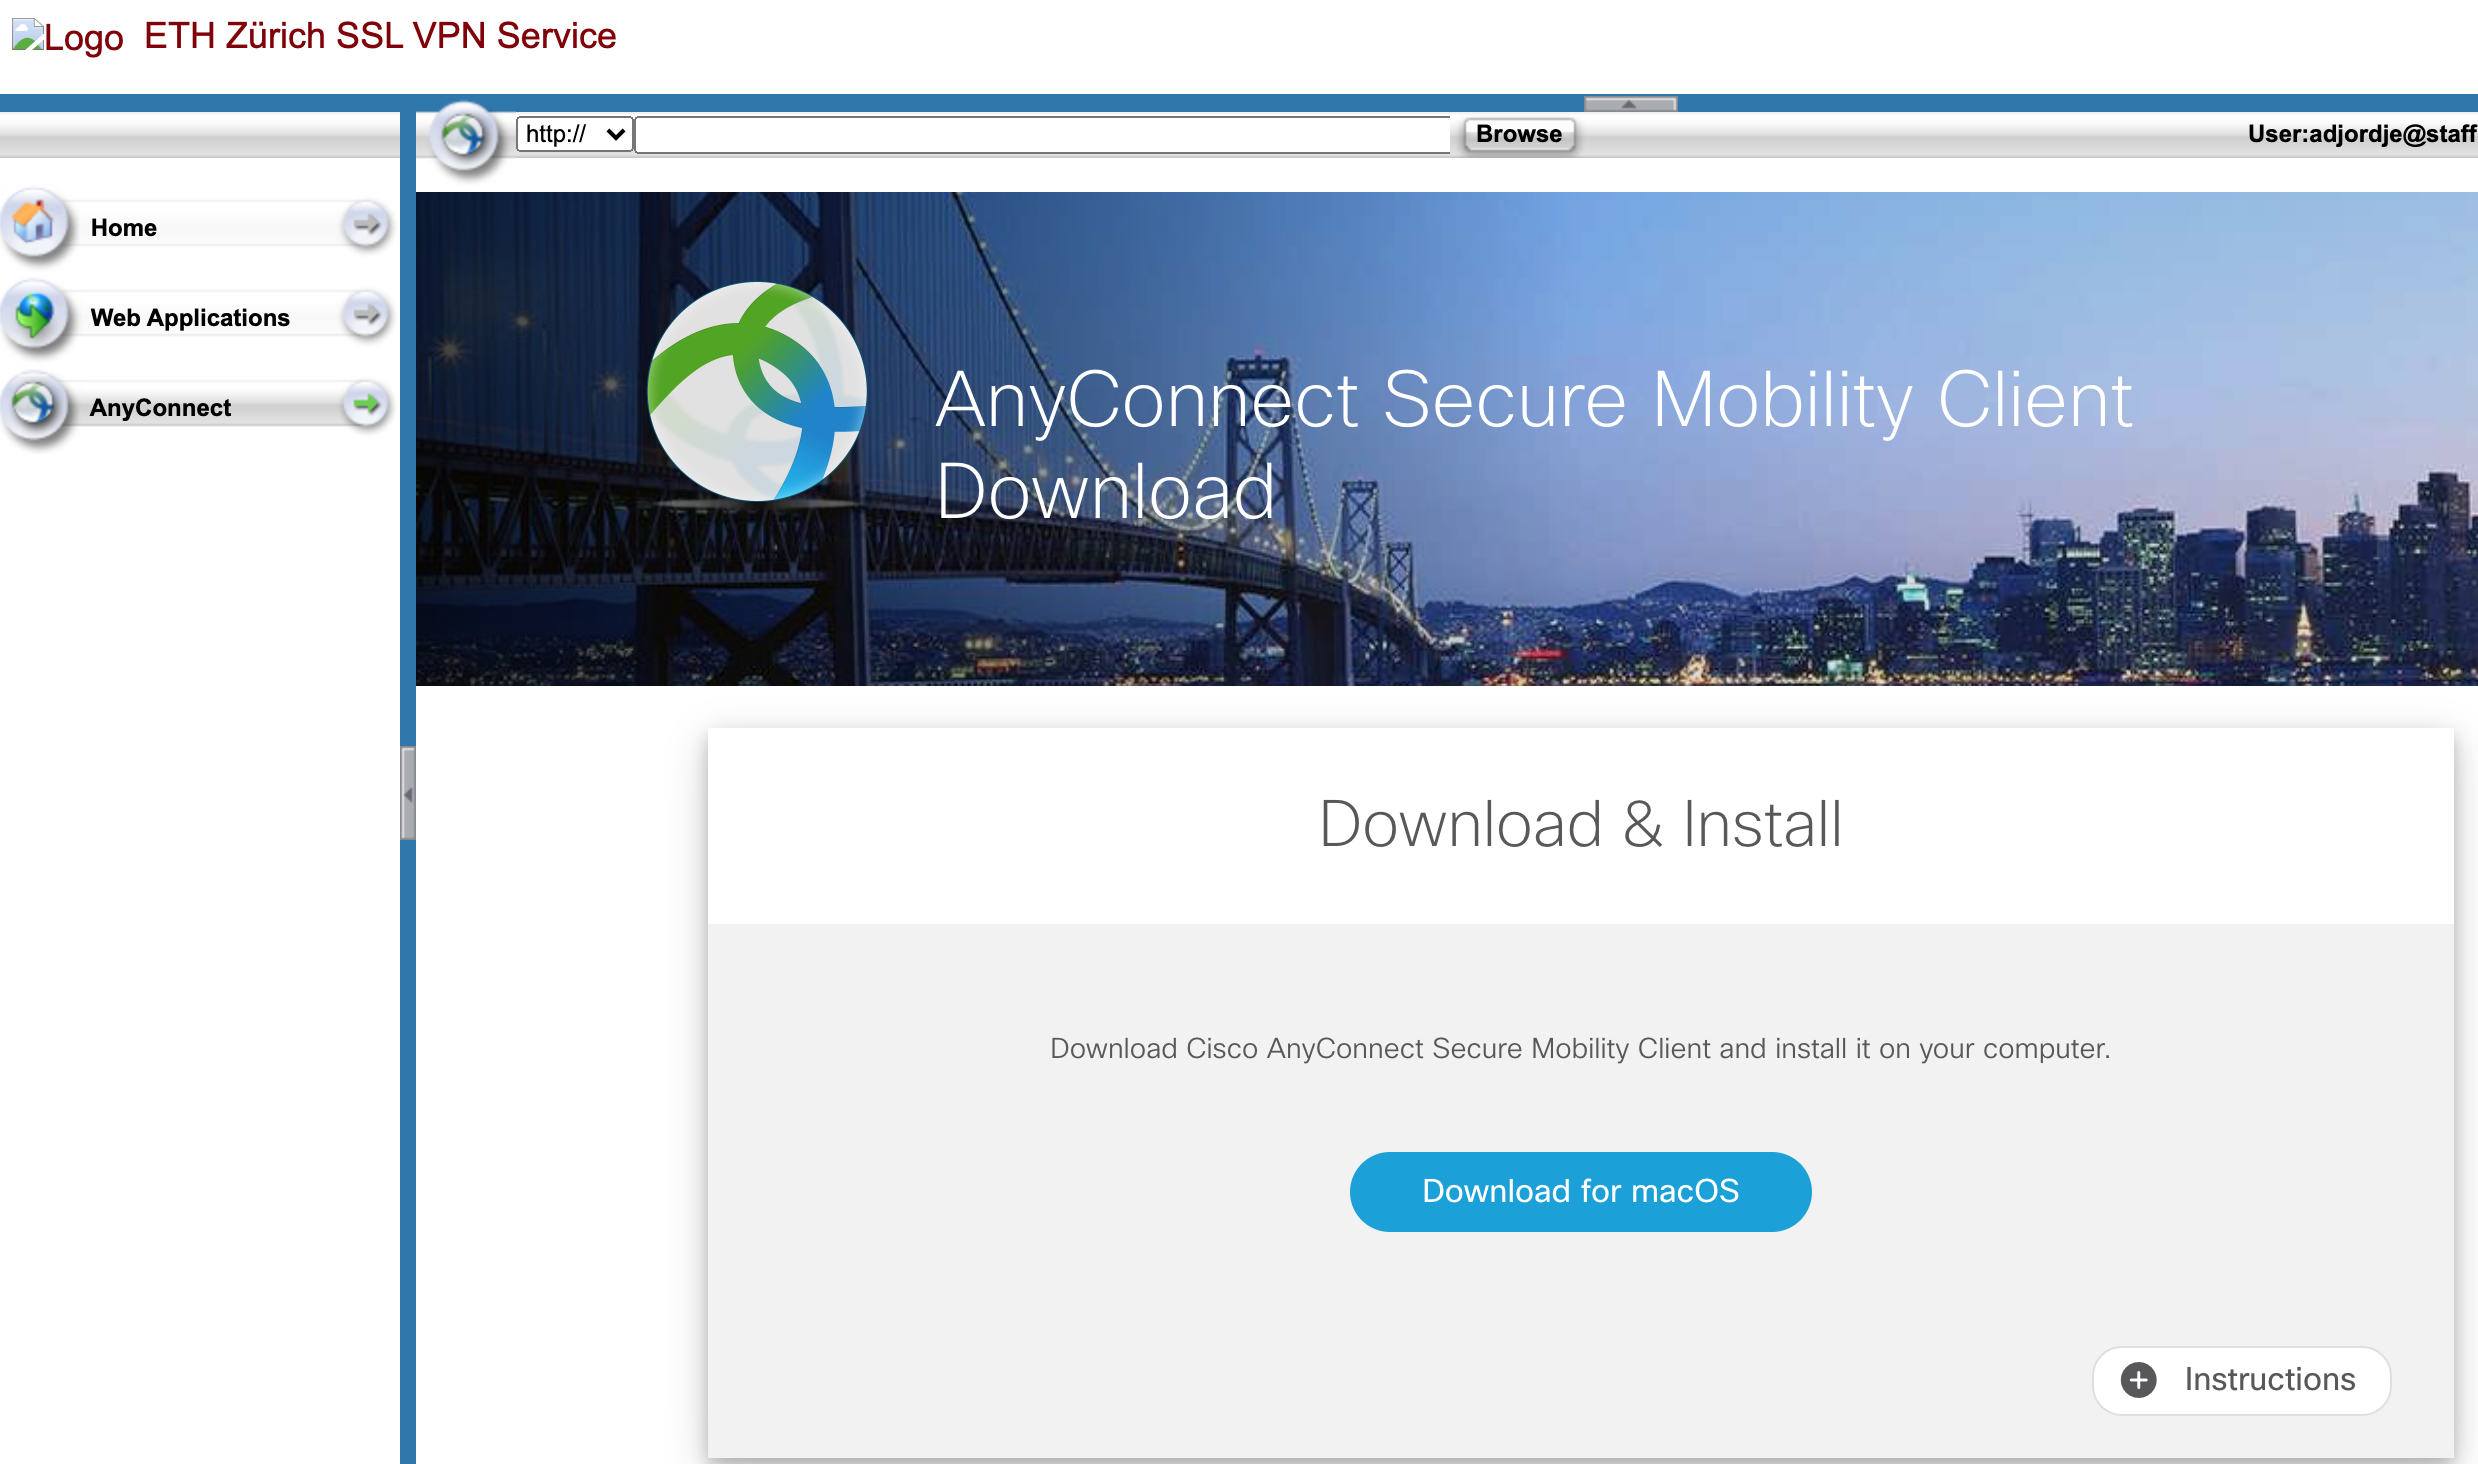
Step Four
Search and Open Cisco AnyConnect
Step Five
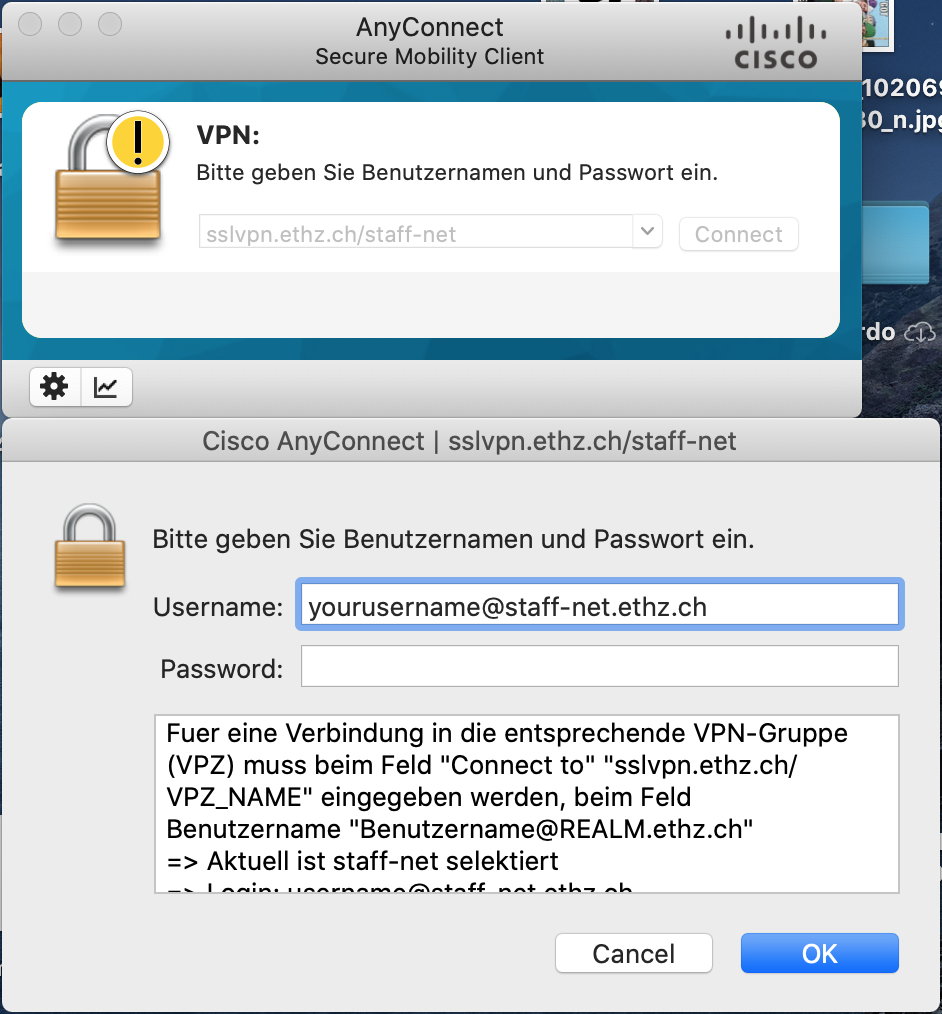
Step Six
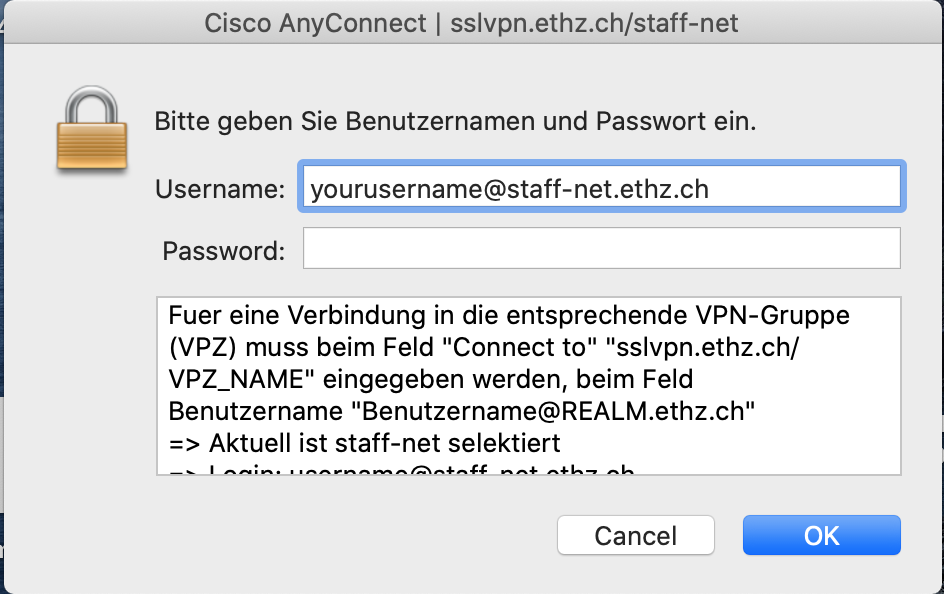
No.
Step
Exemplary Picture
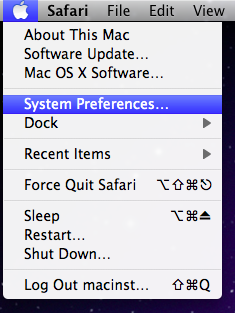
1
Open System Preferences.
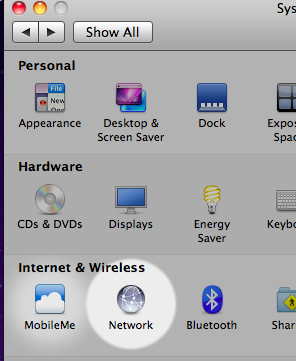
2
Click on 'Network'
3
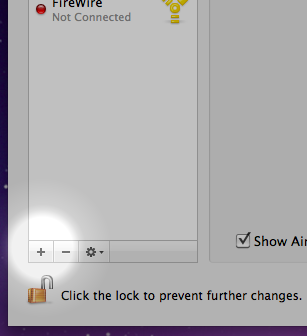
Click on the small '+' (plus)-Button below the Network Interfaces list (to be found on the lower left side of the window).
4
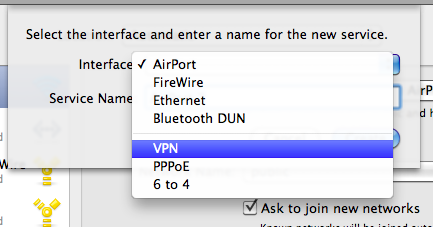
Set 'Interface' to 'VPN'
5
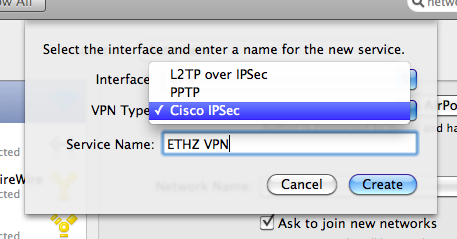
Set 'VPN Type' to 'Cisco IPSec'
6
Set a name for the service, for example 'ETHZ VPN'
(see above)
7
Click on 'Create'
(see above)
8
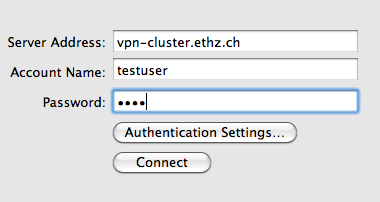
Set 'Server Adress' to 'vpn-cluster.ethz.ch'
9
Set 'Account Name' to your nethz username.
(see above)
10
Set 'Password' to your nethz password
(see above)
11
Click on 'Authentication Settings'
(see above)
12
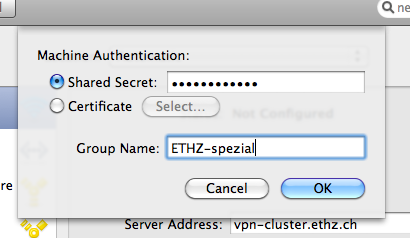
The shared secret is available on the following page: ID Tipps: VPN. You must authenticate with your nethz credentials in order to see it. Enter the password without the quotes into the field 'shared secret'. Your input will be hidden.
13
For 'Group Name', enter ETHZ-spezial (note the dash!)
(see above)
14
Click on 'OK' to close the window.
(none)
15
Click on 'Apply'.
(none)
16
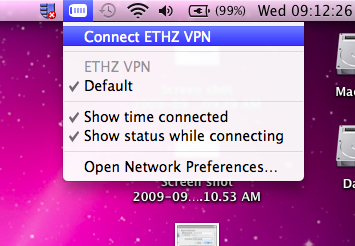
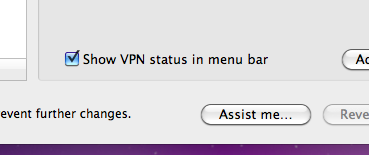
For your convenience, activate the checkbox "Show VPN status in menu bar". An additional symbol will appear on the right side of the menu bar at the top of the screen.
17
By clicking on the symbol mentioned in the previous step, you can connect and disconnect the VPN.
