|
Size: 922
Comment:
|
Size: 958
Comment:
|
| Deletions are marked like this. | Additions are marked like this. |
| Line 19: | Line 19: |
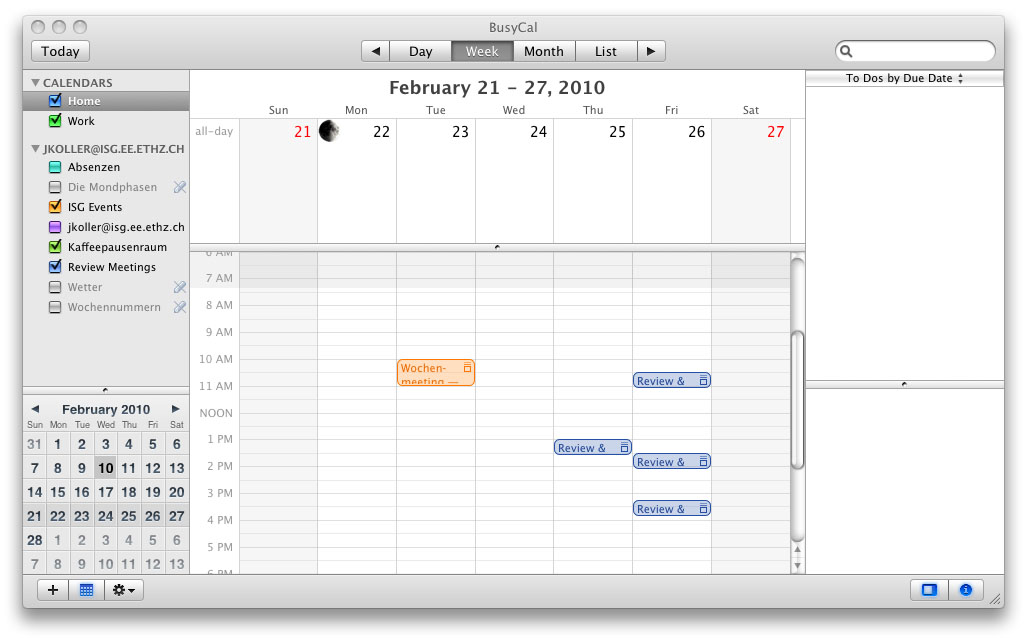
| Now you can activate the calendars you want. They will appear after a few seconds. Finally the programm is activated and it will sync your Google Calendar automaticly with your BusyCal. | Now you can activate the calendars you want to have visible in the main window. They will appear after a few seconds. Finally the program is activated and it will sync your Google Calendar automatically with your BusyCal. |
BusyCal
To use the Google Calender on Mac you have to install BusyCal.
Installation
To install BusyCal you have to buy a license from the Website: http://www.busycal.com/. When you have received the serial key, you can download the application from the same page where you bought it.
Connect to Google Calendar
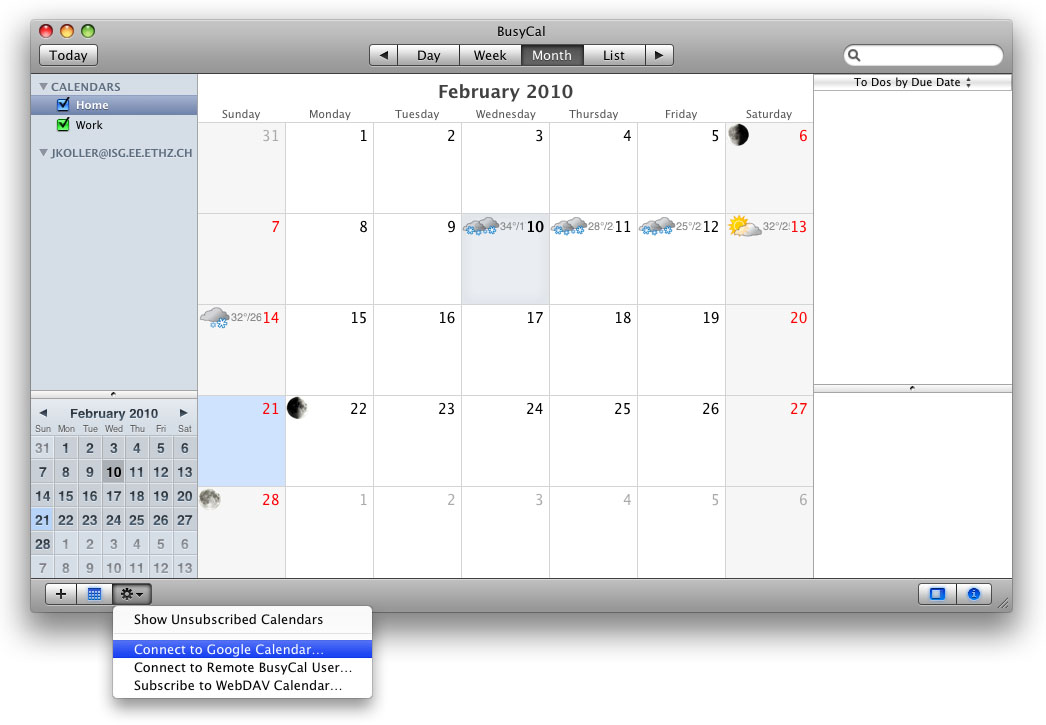
To connect to a Google Calendar, you have to go into settings and then you have to choose "Connect to Google Calendar" as shown in the picture

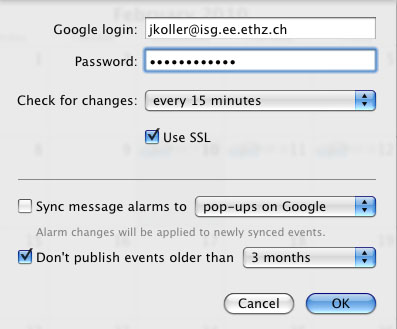
Now you have to insert the data of your Google account into the popup that appears.

Activate the calendars
Now you can activate the calendars you want to have visible in the main window. They will appear after a few seconds. Finally the program is activated and it will sync your Google Calendar automatically with your BusyCal.
