|
Size: 2879
Comment:
|
Size: 2945
Comment:
|
| Deletions are marked like this. | Additions are marked like this. |
| Line 5: | Line 5: |
| 1. Choose '''Email account'''. . {{attachment:thunderbird01.png}} Click '''Next'''. |
1. Choose '''Skip this and use my existing email'''. . {{attachment:thunder01.png}} |
| Line 9: | Line 8: |
| 1. Enter your full name and email address. . {{attachment:thunderbird02.png}} Click '''Next'''. |
1. Enter your full name, email address and password. . {{attachment:thunder02.png}} Click '''Continue'''. |
| Line 13: | Line 12: |
| 1. Select: * Type of incoming server: '''IMAP''' |
1. Thunderbird now tries some default server names and should find the following settings for your account: |
| Line 16: | Line 14: |
| * Incoming Server: '''imap.ee.ethz.ch''' | {{attachment:thunder03.png}} |
| Line 18: | Line 16: |
| * Outgoing Server: '''smtp.ee.ethz.ch''' | Click '''Done'''. |
| Line 20: | Line 18: |
| {{attachment:thunderbird03.png}} | 1. Thunderbird now creates your email account. You can now check or modify some settings of the newly created account in the '''Account Settings'''. |
| Line 22: | Line 20: |
| Click '''Next'''. | 1. In the '''Server Settings''' you can see the settings for the incoming mail server: . {{attachment:thunder04.png}} |
| Line 24: | Line 24: |
| 1. '''Incoming User Name''' and '''Outgoing User Name''' are probably already right. They should be both set to the name of your account . {{attachment:thunderbird04.png}} Click '''Next'''. 1. Set the '''Account Name''' to anything you want (you can leave it as is) . . {{attachment:thunderbird05.png}} Click '''Next'''. 1. Verify that everything is correctly set. . {{attachment:thunderbird06.png}} Click '''Next'''. |
1. Under '''Outgoing Server''' you can see the settings of the outgoing mail server: . {{attachment:thunder06.png}} |
| Line 62: | Line 53: |
| 1. In the '''Account Settings''' window, select '''Synchronization & Storage''' and '''uncheck "Keep message for this account on this computer"'''. . {{attachment:caching.png}} |
1. In the '''Account Settings''' window, select '''Synchronization & Storage''' and '''uncheck "Keep message for this account on this computer"'''. Also make sure to select the option '''{{{Synchronize the most recent 1 days}}}''' . {{attachment:FAQ/IMAPdisableSync/thunderbirdSync01.jpg}} |
| Line 80: | Line 71: |
| ---- [[CategoryMAIL]] |
Configuration of Thunderbird
Start Thunderbird. The Account Wizard will appear if you didn't yet setup your mail account. Otherwise, you can start it by clicking Add Account... in the Account Settings window.
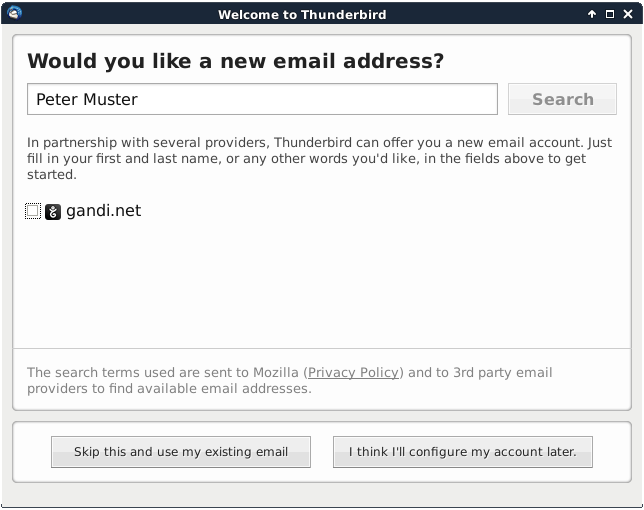
Choose Skip this and use my existing email.
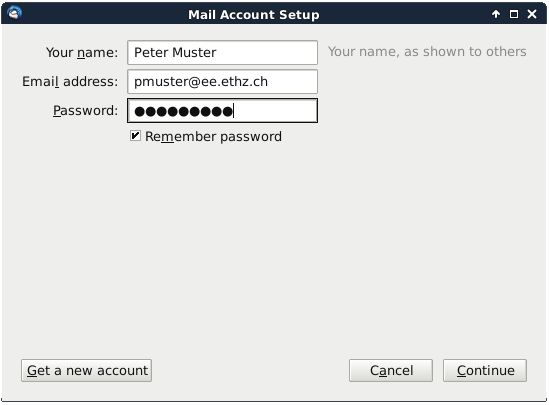
- Enter your full name, email address and password.
Click Continue.
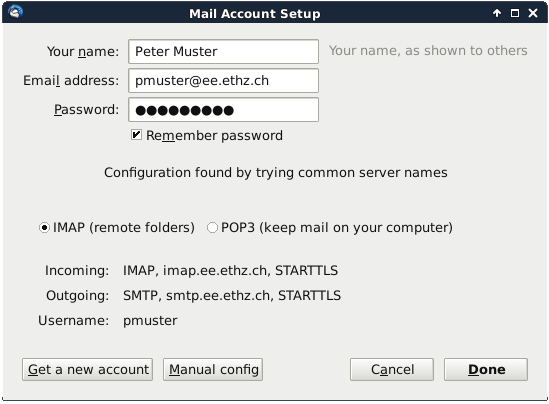
- Thunderbird now tries some default server names and should find the following settings for your account:
Click Done.
Thunderbird now creates your email account. You can now check or modify some settings of the newly created account in the Account Settings.
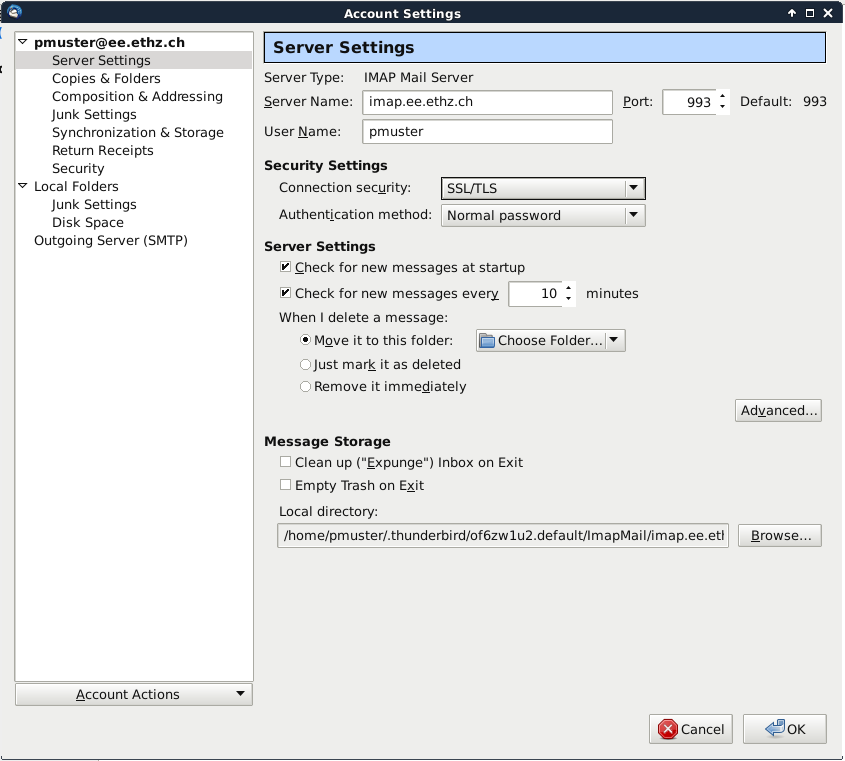
In the Server Settings you can see the settings for the incoming mail server:
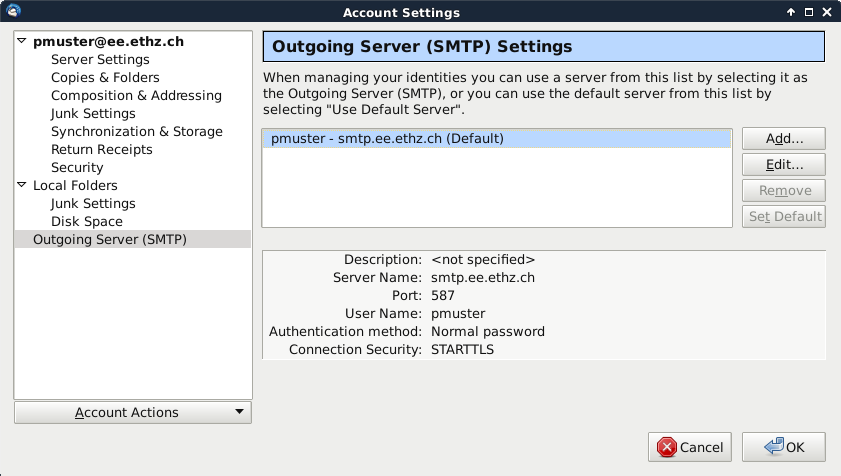
Under Outgoing Server you can see the settings of the outgoing mail server:
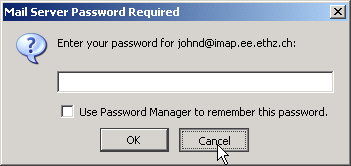
Although the Account Wizard has now finished setting up your account, you still need to do some configuration changes before you can use your account. Press therefore Cancel when prompted for the password.
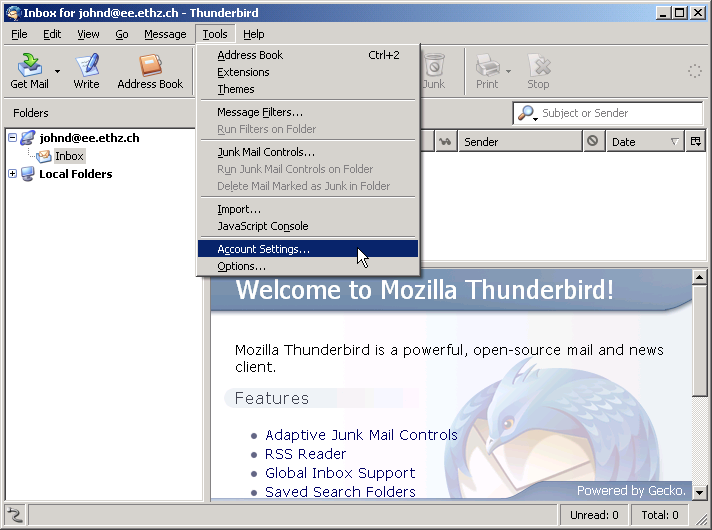
Open the Account Settings window by choosing Account Settings... in the Tools menu
Select Server Settings (on the left) and make sure that the following is true:
Server Name: imap.ee.ethz.ch
Port: 993
Connection security: SSL/TLS
Authentication method: Normal password
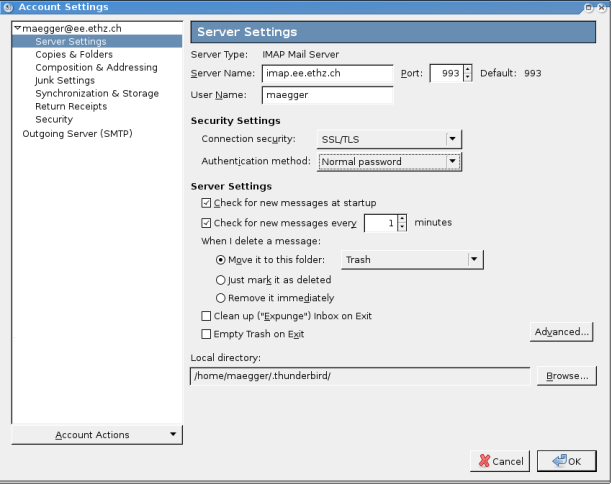
Click on the Advanced... button under "Server Settings" and configure:
IMAP server directory: empty (blank)
Show only subscribed folders: no (unchecked)
Server supports folders that contain sub-folders and messages: no (unchecked)
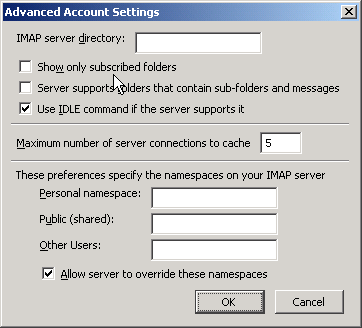
Click OK.
In the Account Settings window, select Synchronization & Storage and uncheck "Keep message for this account on this computer". Also make sure to select the option Synchronize the most recent 1 days
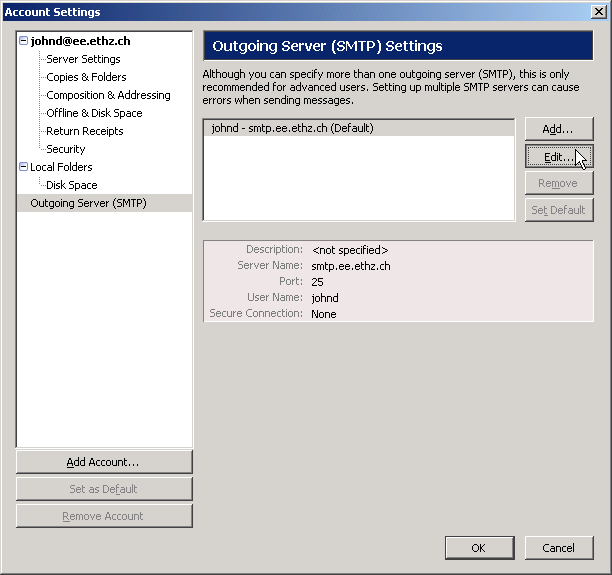
In the Account Settings window, select Outgoing Server (SMTP) and then Edit
The following settings for SMTP Server should be set:
Server Name: smtp.ee.ethz.ch
Port: 587
Connection security: STARTTLS
Authentication method: Normal password
- User Name: your username
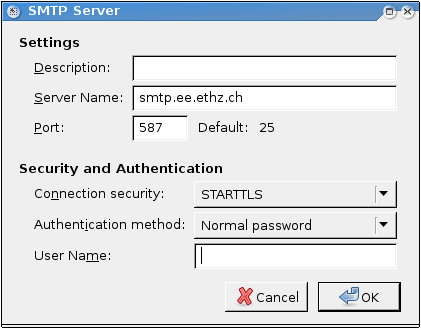
Click OK and exit the Account Settings windows. Now your account should be ready to go!
